The Ubiquiti EdgeRouter: Configuring this extremely low-cost, enterprise-grade router for home use
TweetUpdated Jan 17, 2015: Moved the dynamic DNS away from a scheduled task to the new custom- service method
Updated Apr 3, 2016: Added dynamic DNS instructions for iwantmyname
Updated Jul 24, 2016: Added NAT-PMP for UPnP, up-to-date dynamic DNS methods, IPv6 instructions, and EdgeRouter-X mention
I’ve gotten a new, inexplicable, love for Ubiquiti. They fit in my favorite category of companies: they make high quality products that cost nothing compared to the old-boys-club equivalents. Oh and these products look spectacular. I’m actually quite surprised how UBNT is able to do all the things they do… I couldn’t support them more.
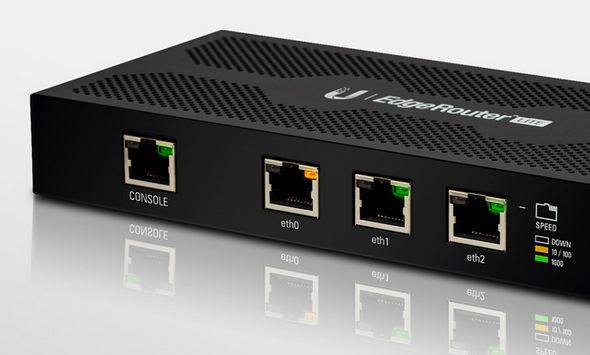
After finding out about them from MonkeyBrains, I looked through their product line to be quite surprised at the feature sets, yet still low cost. Being a huge fan of networking equipment, I decided to buy their cheapest router (at the time), the EdgeMAX EdgeRouter Lite. A 3 port, gigabit-capable router, that can really only be configured by commandline. Today, they have an even cheaper version of it, for $50! The EdgeRouter-X.
For this article, we’re going to configure the EdgeRouter Lite for home-use. Instructions should be similar if not identical for the EdgeRouter-X.
A Challenger Appears! and it’s only $100!
Getting going
First off, like I mentioned, this thing is only really configurable via commandline. It uses a forked version of the opensourced edition of Vyatta 6.3 (now maintained as VyOS post their acquisition by Brocade). So to learn about how this thing works, you’ll need to read pages upon pages of documentation from the old Vyatta docs keeping in mind the Ubnt has modified a bunch of stuff too. A lot of help is available on their community page. Oddly enough, they don’t document anything they do, so you’re stuck reading release notes and harassing the employees that troll the forums.
A great way to get started is to read the EdgeOS CLI Primer and the Basic System [PDF] docs.
When you buy and receive yours, plug into Port 0, assign yourself a Static IP, and use the https Web UI to upload the latest version of their firmware (which is 1.6 as of this writing). This will get you up to speed with all the latest Web UI (which is still heavily limited). Use the Wizards on the 1.6 Web UI to get an initial configuration that can actually route something. Then lets start customizing it.
Log in via SSH with ubnt/ubnt.
Port forwarding
As of 1.4, Ubiquiti added the non-Vayatta config of port-forward. Whereas in the past you’d need to manually create NAT mappings and firewall rules (as per here), the EdgeRouter now has made it significantly easier with even automatic firewall rules.
port-forward {
  auto-firewall enable
  hairpin-nat enable
  lan-interface eth1
  rule 1 {
    description "synology webui http"
    forward-to {
      address 192.168.0.10
      port 5000
    }
    original-port 9876
    protocol tcp
  }
  rule 2 {
    description "router ssh"
    forward-to {
      address 192.168.0.1
      port 22
    }
    original-port 8792
    protocol tcp
  }
  wan-interface eth0
}
As a reminder, to actually set settings on the router, switch to configuration mode, configure. Then use commands like set port-forward auto-firewall enable or set port-forward rule 1 forward-to address 192.168.0.10 to actually set the settings. Then use commit and save to make the config live and save it to /config.
In this example, we have the WAN on eth0 and LAN on eth1. We enable auto-firewall which really makes our life easy by dealing with firewall rules for LAN targets (more on that later). hairpin-nat makes it so that if an app on your LAN uses your public IP address as the remote host, the router will turn the packet right around without going out to your ISP.
There are two rules, rule 1 which we have exposed the Synology DiskStation Manager WebUI (great device btw) to the outside. Connections from TCP port 9876 on our WAN interface will be forwarded to 192.168.0.10 on port 5000. Firewall rules will automatically be created to allow incoming connections to the LAN for this port because of the auto-firewall instruction.
rule 2 allows me to access the router’s SSH for config from the outside. Same deal as rule 1 except unfortunately when routing to the router itself, it appeared as though I needed to create the firewall rule manually.
firewall {
  name WAN_LOCAL {
    [...]
    rule 4 {
      action accept
      description "port forwarding manual - router ssh"
      destination {
          address 192.168.0.1
          port 22
      }
      log disable
      protocol tcp
    }
    [...]
  }
}
Reminder that WAN_LOCAL is for packets between the outside and destined for the router versus WAN_IN which is for packets destined for the LAN. Normally home-grade routers don’t really distinguish these two apart, but for advanced configuration’s sake, this is the case here.
This firewall rule basically allows traffic that should be going to 192.168.0.1, the router’s internal IP, to access port 22, the internal port for ssh.
DHCP static mappings
It’s always useful to have a couple machines on the network use DHCP, yet always get the same IP addresses assigned to them. Fortunately doing so is quite easy.
service {
  dhcp-server {
    [...]
    hostfile-update enable
    shared-network-name LAN {
      [...]
      authoritative enable
      subnet 192.168.0.0/24 {
        static-mapping driveway-camera {
            ip-address 192.168.0.20
            mac-address 00:02:d1:12:d3:e9
        }
        static-mapping synology {
            ip-address 192.168.0.10
            mac-address 00:11:32:41:1e:25
        }
      }
    }
  }
}
It’s mostly obvious what this does though the hostfile-update enable section is useful so you can access these mappings by name from the DNS server and other routing rules.
Enable UPnP
There are security problems with UPnP in general, but because of stuff like BitTorrent, World of Warcraft and many other applications, we need it to be easy to open ports for faster peer-to-peer.
service {
  upnp2 {
    listen-on eth1
    wan eth0
    nat-pmp enable
    secure-mode enable
  }
}
We’re using the upnp2 to do this. It’s the more up to date UPnP server in comparison to the legacy upnp that was available on the Vayatta system. upnp2 is more compatible with the latest applications too. Ubiquiti also included the ability to configure NAT-PMP, Apple’s way of doing UPnP (for things like Back To My Mac). secure-mode here just ensures that a computer cannot open a port for another.
Dynamic DNS Updates
It’s always useful to update a dynamic dns provider like DynDNS whenever your public IP changes. I personally own lg.io and I want it to be updated. The router actually has some convenient dynamic dns abilities depending on your provider. Below is an example using the custom- syntax for a No-IP entry and my iwantmyname updater too:
dynamic {
  interface eth0 {
    service custom-oursfapt {
      host-name oursfapt.workisboring.com
      login AWESOMEUSERNAME
      password AWESOMEPASSWORD
      protocol noip
    }
    service custom-iwantmyname {
      host-name myawesomehostname.lg.io
      login abc@def.com
      options script=/basicauth/ddns
      password awesomepassword
      protocol dyndns2
      server iwantmyname.com
    }
  }
}
In order to use a non-standard hostname (or service), you need to use the custom- prefix to the service name. Additionally, the protocol needs to be one that ddclient supports (look for the my %services = ( line).
IPv6
The future is now, and you should start using IPv6. The router certainly doesn’t make this easy, and there are like 50 flavors of configuring IPv6 for different ISPs. The following is what I use with my ISP MonkeyBrains.
First up, like for IPv4, we’ll need to add firewall rules to let IPv6 traffic pass-through the router:
firewall {
  [...]
  ipv6-name IPv6_WAN_IN {
    default-action drop
    description "IPv6 packet from the internet to LAN"
    rule 1 {
      action accept
      description "Allow established sessions"
      state {
        established enable
        related enable
      }
    }
    rule 5 {
      action accept
      description "Allow ICMPv6"
      log disable
      protocol icmpv6
    }
    rule 10 {
      action drop
      description "Drop invalid connections"
      state {
        invalid enable
      }
    }
 }
 ipv6-name IPv6_WAN_LOCAL {
    default-action drop
    description "IPv6 WAN to Local"
    rule 5 {
      action accept
      description "Allow established sessions"
      state {
        established enable
        related enable
      }
    }
    rule 10 {
      action drop
      description "Drop invalid connections"
      state {
        invalid enable
      }
    }
    rule 15 {
      action accept
      protocol ipv6-icmp
    }
    rule 30 {
      action accept
      description "Allow dhcpv6"
      destination {
        port 546
      }
      protocol udp
      source {
        port 547
      }
    }
  }
  ipv6-receive-redirects disable
  ipv6-src-route disable
}
Next, you’ll need to get an IPv6 address for your router from your ISP. Typically they have DHCPv6 to do this for you, but not always. Fortunately for me MonkeyBrains does. Due to the way DHCPv6 works, we then use Prefix Delegation to route requests to the proper clients and we’ll use SLAAC for internal discovery.
interfaces {
  [...]
  ethernet eth0 {
    [...]
    dhcpv6-pd {
      pd 0 {
        interface eth1 {
          service slaac
        }
        prefix-length 64
      }
      rapid-commit enable
    }
  }
}
Oh and don’t forget to assign the IPv6 firewall rules to the internet interface:
interfaces {
  [...]
  ethernet eth0 {
    [...]
    in {
      ipv6-name IPv6_WAN_IN
      [...]
    }
    out {
      ipv6-name IPv6_WAN_LOCAL
      [...]
    }
  }
}
And that should be it! Sometimes it can take a while for IPs to get set up, but once it is, you should be good to go. A good way of testing is to SSH into the router and issue the command: ping6 google.com. Then try it on your own computer.
Selective VPN routing (Policy-based Routing)
So here’s the fun part. The great part of an enterprise router is that it can do some pretty crazy things. What I like it for? Well, my parents want to use services like Netflix, Hulu, etc. But because of all sorts of anti-consumer business tactics on the publishers’ parts, these services don’t have a full catalogue available in Canada.
Using the EdgeRouter, you can do things like route all traffic from one LAN client (like an Apple TV) to always go through a VPN (like an OpenVPN). Fancy! Lets do it.
interfaces {
  [...]
  openvpn vtun0 {
    config-file /config/auth/pia/USEast.ovpn
  }
}
I use Private Internet Access. They’re kinda sketch in their branding, but they have a great product and have access to OpenVPN too, which I wanted. What sucks though – OpenVPN is not hardware accelerated on the EdgeRouter. This isn’t great for throughput. We’ll only be able to do about 7mbit/s. Fortunately that’s sufficient for my parents’ needs though. The EdgeRouter does support hardware accelerated IPSec, but there aren’t any VPN providers out there that I know of that allow you to tunnel IPSec through them.
Here’s the config I use with PIA (in /config/auth/pia/USEast.ovpn):
client
dev vtun
proto udp
remote us-east.privateinternetaccess.com 1194
resolv-retry infinite
nobind
persist-key
persist-tun
ca /config/auth/pia/ca.crt
tls-client
remote-cert-tls server
auth-user-pass /config/auth/pia/pw.txt
comp-lzo
verb 1
reneg-sec 0
crl-verify /config/auth/pia/crl.pem
route-nopull
The big deal is the route-nopull which makes it so that PIA doesnt set the default gateway and route all your traffic to the VPN. Normally you’d use a VPN provider on your computer to route everything, but in this case we only want selective routing. Which we’ll set up next.
The way we can modify packets to go through a different interface is to use the firewall. Lets create a firewall modify config to take all traffic from one IP address and force it over the OpenVPN tunnel we created above.
firewall {
  modify SOURCE_ROUTE {
    rule 10 {
      description "traffic from a lan ip goes through vpn"
      modify {
        table 1
      }
      source {
        address 192.168.0.250/32
      }
    }
  }
}

protocols {
  static {
    table 1 {
      interface-route 0.0.0.0/0 {
        next-hop-interface vtun0 {
        }
      }
    }
  }
}

interfaces {
  ethernet eth1 {
    [...]
    firewall {
      in {
        modify SOURCE_ROUTE
      }
    }
  }
}
table 1 is just a static routes table. By using 0.0.0.0/0 we’re basically matching everything on this routing table to go to the VPN. What’s neat here is the interface-route and next-hop-interface which makes it much easier to specify which tunnel to take, even when you could be assigned a dynamic ip.
Finally, data has been sent out through the VPN now, but we need to be able to receive data back too. For that, much like on the WAN, we need to masquerade NAT:
service {
  nat {
    rule 5001 {
      description "masquerade for VTUN0"
      log disable
      outbound-interface vtun0
      type masquerade
    }
  }
}
And that’s it! Now everything from 192.168.0.250 will always be tunneled through the OpenVPN – and the Apple TV will have absolutely no idea what’s going on.
That’s all!
I love this router. The policy-based routing example above only begins to scratch the surface of how powerful it can really be. Yes, it’s complicated to set up, but it’s not that bad. The config is straightforward, there’s just a bunch of it. Ubiquiti is working to make this stuff configurable via the Web UI, but for now I’ll take advantage of its complexity for my own exclusive club of awesomeness.